Do you know how to use Google XML sitemap plugin in wordpress? Google XML sitemap is aplugin which helps to improve the SEO (Search Engine Optimization) to generate unique XML sitemaps that will assist search engines like Yahoo, Bing, Ask.com,and Google to index a website’s content better.
How To Use Google XML Sitemap Plugin In WordPress
Contents
Google XML Sitemaps, developed by Arne Brachhold, is one of the best XML Sitemaps available to the public for a good decade. One can download this plugin for free from the WordPress repository. It is also the top-rated WordPress plugin of all time with a rating of 4.9 out of 5 with more than 18 million downloads to date. Below are the steps one can follow to use Google XML sitemap plugin in WordPress.

Indexing means that the content of a website is recognized and discovered by search engines through applicable search queries. Once the website is indexed, it will start appearing on SERPs or Search Engine Result Pages. Although the pluginis named as “Google XML Sitemaps”, it works perfectly fine with Bing, Yahoo or any other search engines. One must install WordPress on the site before installing this plugin.
Installing the Google XML Sitemaps Plugin
The first step is to install the plugin. The process is extremely simple and time efficient.
Firstly, Log in to the WordPress dashboard and then go to the Plugins option. Next, click on Add New and then proceed to type ‘Google XML Sitemaps’ in the search menu. There are a lot of plugins with similar names, so make sure to search for the right one which is by Arne Brachhold.
After finding the original one, click on Install Now and then Activate Plugin. The job is done. After completing the installation, the following message is portrayed on the top of the screen: ‘Search engines haven’t been notified yet’. If the user wants to get his/her site indexed as fast as possible, he/she can hit the notify search engines about your sitemap option.

Once the plugin is activated, Google XML Sitemaps will begin to initiate the first sitemap automatically and takes a snapshot of the website in its initial state. He/she can look into their sitemap by adding/sitemap.xml extension into the domain.
Configuring the Google XML Sitemaps
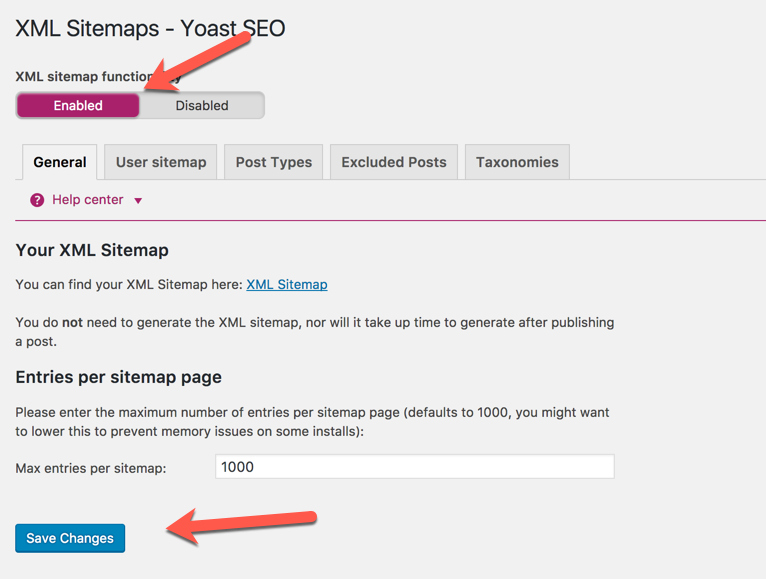
After installing the plugin, the next step is to configure the newly installed plugin. All of the settings and options of the plugin are administered from one screen which can be found by going to Settings and then to XML-Sitemap. Although the plugin comes with pre-configurations, one can leave the settings as it is, and expect it to work just fine even without any changes. It is completely up to the user whether he/she wants to configure the plugin or leave it to work with the pre-configuration.
For those who want to explore and learn more about what the plugin could do, these 7 options might help them in giving a full rundown of the plugin.
- Basic Options:
As the title suggests, this section lets the users control the basic configurations. For beginners, he/she can decide to choose what search engines they want to notify about his/her site’s update. Usually leaving both Bing and Google checkbox ticked is recommended. In the next option, leave the Add sitemap URL to the virtual robots.txt file checked as well. This can help get the site indexed in some other search engines as well. Next option is the Advanced Options. It is okay to leave all the options as it is and skip them.
- Additional Pages
This section is usually only relevant to those who use sub-domains and sub-directories and lets them to enumerate additional external pages which are then added to the sitemap. This section is usually not of much importance and can be skipped.
- Post Priority:
This section looks at how each post is prioritized. There are three options here. Using the Comment Count option in the middle is recommended. It helps the popular posts of the site to gain a higher priority level automatically.

- Sitemap Content:
This section allows the users to select what items, taxonomies, and post types they want to be included in the sitemap. Tick the Include homepage, Include posts, and Include Static pages options and leave the other options as it is.
- Excluded Items:
This section allows users to exclude various categories from the sitemap including pages and individual posts by entering the ID numbers.
- Change Frequencies:
Change frequencies are rules given to the search engines, telling them how regularly content is probably going to change. This data tells the search engines when they have to send their crawler bots to search for updates.
- Priorities:
This section basically allows its users to rank their contents based on how important it is. Give the most priority to the homepage as it is the most important page. Popular blog posts and static pages are also important so it is suggested to score hem highly too.
Overall, Google XML Sitemaps Plugin is truly an extraordinary plugin and arguably the finest WordPress Sitemap plugin. One of its major qualities is that the default configurations are sensible and the whole plugin is easy to use and free.
Leave a Reply